THINKPHP5消息队列
本文使用TP5自带的think-queue 消息队列
通过composer安装think-queue
TP5.0
composer require topthink/think-queue ^v1.1.4
TP5.1
composer require topthink/think-queue
注:这里需要指定版本,think-queue最新版为v2.0(现在是2018-9-21),默认会安装V2.0,但是v2.0要求thinkPHP版本为v5.1,不支持thinkPHP5.0
安装完后打开cmd,进入项目根目录,执行php think,里面如果能看到queue的几个命令说明OK了,如下图:
建立数据表(注意修改表前缀配置)
CREATE TABLE `jobs` (
  `id` INT(11) NOT NULL AUTO_INCREMENT,
  `queue` VARCHAR(255) NOT NULL,
  `payload` LONGTEXT NOT NULL,
  `attempts` TINYINT(3) UNSIGNED NOT NULL,
  `reserved` TINYINT(3) UNSIGNED NOT NULL,
  `reserved_at` INT(10) UNSIGNED DEFAULT NULL,
  `available_at` INT(10) UNSIGNED NOT NULL,
  `created_at` INT(10) UNSIGNED NOT NULL,
  PRIMARY KEY (`id`)
) ENGINE=INNODB DEFAULT CHARSET=utf8;
不推荐使用数据库 最好使用Redis
修改配置
1.extraqueue.php文件,'connector' => 'database'(这里采用mysql数据库方式)
2.database.php文件,root root 3306 s1 dp_
<?php
return [
    'connector' => 'database',
       // 'connector'  => 'Redis',            // Redis 驱动
       // 'expire'     => null,                // 任务的过期时间,默认为60秒; 若要禁用,则设置为 null
       // 'default'    => 'default',        // 默认的队列名称
       // 'host'       => '127.0.0.1',        // redis 主机ip
       // 'port'       => 6379,            // redis 端口
       // 'password'   => '',                // redis 密码
       // 'select'     => 0,                // 使用哪一个 db,默认为 db0
       // 'timeout'    => 0,                // redis连接的超时时间
       // 'persistent' => false,            // 是否是长连接
];
代码编写
在home模块下新建Jobs.php控制器
<?php
namespace app\home\controller;
use think\Queue;
use think\queue\Job;
use app\api\model\User as M_User;
class Jobs
{
    public function index($user_id=86){
        //生成任务
        $data = array(
            'user_id'=>$user_id,
        );
        Queue::push('app\home\controller\Jobs@UserVIP', $data, $queue = null);
        //三个参数依次为:需要执行的方法,传输的数据,任务名默认为default
    }
    //任务2
    public function UserVIP(Job $job, $data){
        //处理任务逻辑
        $isJobDone = false;
        if(!empty($data['user_id'])){
            $user = M_User::get($data['user_id']);
            if(!empty($user) and $user['type']==2){
                //用户不为空,并且用户类型为会员(type 1为普通用户,2为会员)
                $vip_end_time = strtotime($user['vip_end_time']);
                if($vip_end_time<time()){
                    $result = $user->save(['type'=>1]);
                    if($result){
                        $isJobDone = true;
                    }
                }

            }else{
                $isJobDone = true;
            }

        }else{
            $isJobDone = true;
        }
        //执行结果处理
        if ($isJobDone) {
            //成功删除任务
            $job->delete();
        } else {
            echo $job->attempts();
            $job->release(10);
            //任务轮询4次后删除
            if ($job->attempts()>3) {
                // 第1种处理方式:重新发布任务,该任务延迟10秒后再执行
                // $job->release(10);
                // 第2种处理方式:原任务的基础上1分钟执行一次并增加尝试次数
                //$job->failed();
                // 第3种处理方式:删除任务
                // $job->delete();
            }
        }
    }
}
?>
在浏览器访问index方法
http://你的域名/home/jobs/index
访问完后数据库jobs表会多一条记录如下图 
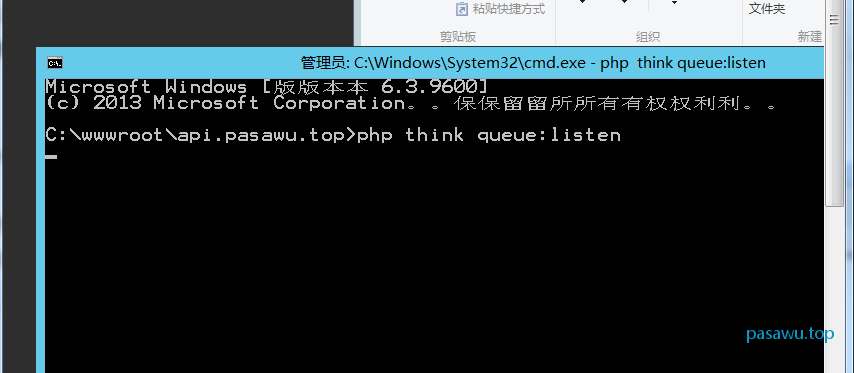
最后打开cmd进入项目根目录
输入
php think queue:listen执行后,窗口处于监听状态,会自动执行刚入库的记录,然后你在新增一条消息,监听到记录,又会开始执行!如下图
相关文章推荐
http://www.thinkphp.cn/topic/52334.html
https://github.com/lypeng29/think-queue
https://www.kancloud.cn/yangweijie/learn_thinkphp5_with_yang/367645
https://blog.csdn.net/will5451/article/details/80434174
本文为Pasa吴原创文章,转载无需和我联系,但请注明来自Pasa吴博客https://www.pasawu.top
- 上一篇: GatewayWorker创建wss服务
- 下一篇: layui 二级联动

- latest comments
- 总共0条评论
最新评论